Email notifications
Email notifications let you (and your team) receive a fully customizable email every time a form receives a new submission.
How email notifications work
Section titled “How email notifications work”- When a new submission is received and passes validation, Forminit triggers the configured email notifications.
- The default email body is built from your visible form blocks in order. You can edit block labels, order, and visibility from Settings → Blocks.
- You can customize the sender, recipients, subject, and email content, and you can use form block variables within the email body, subject, and email fields.
Configuring an email notification
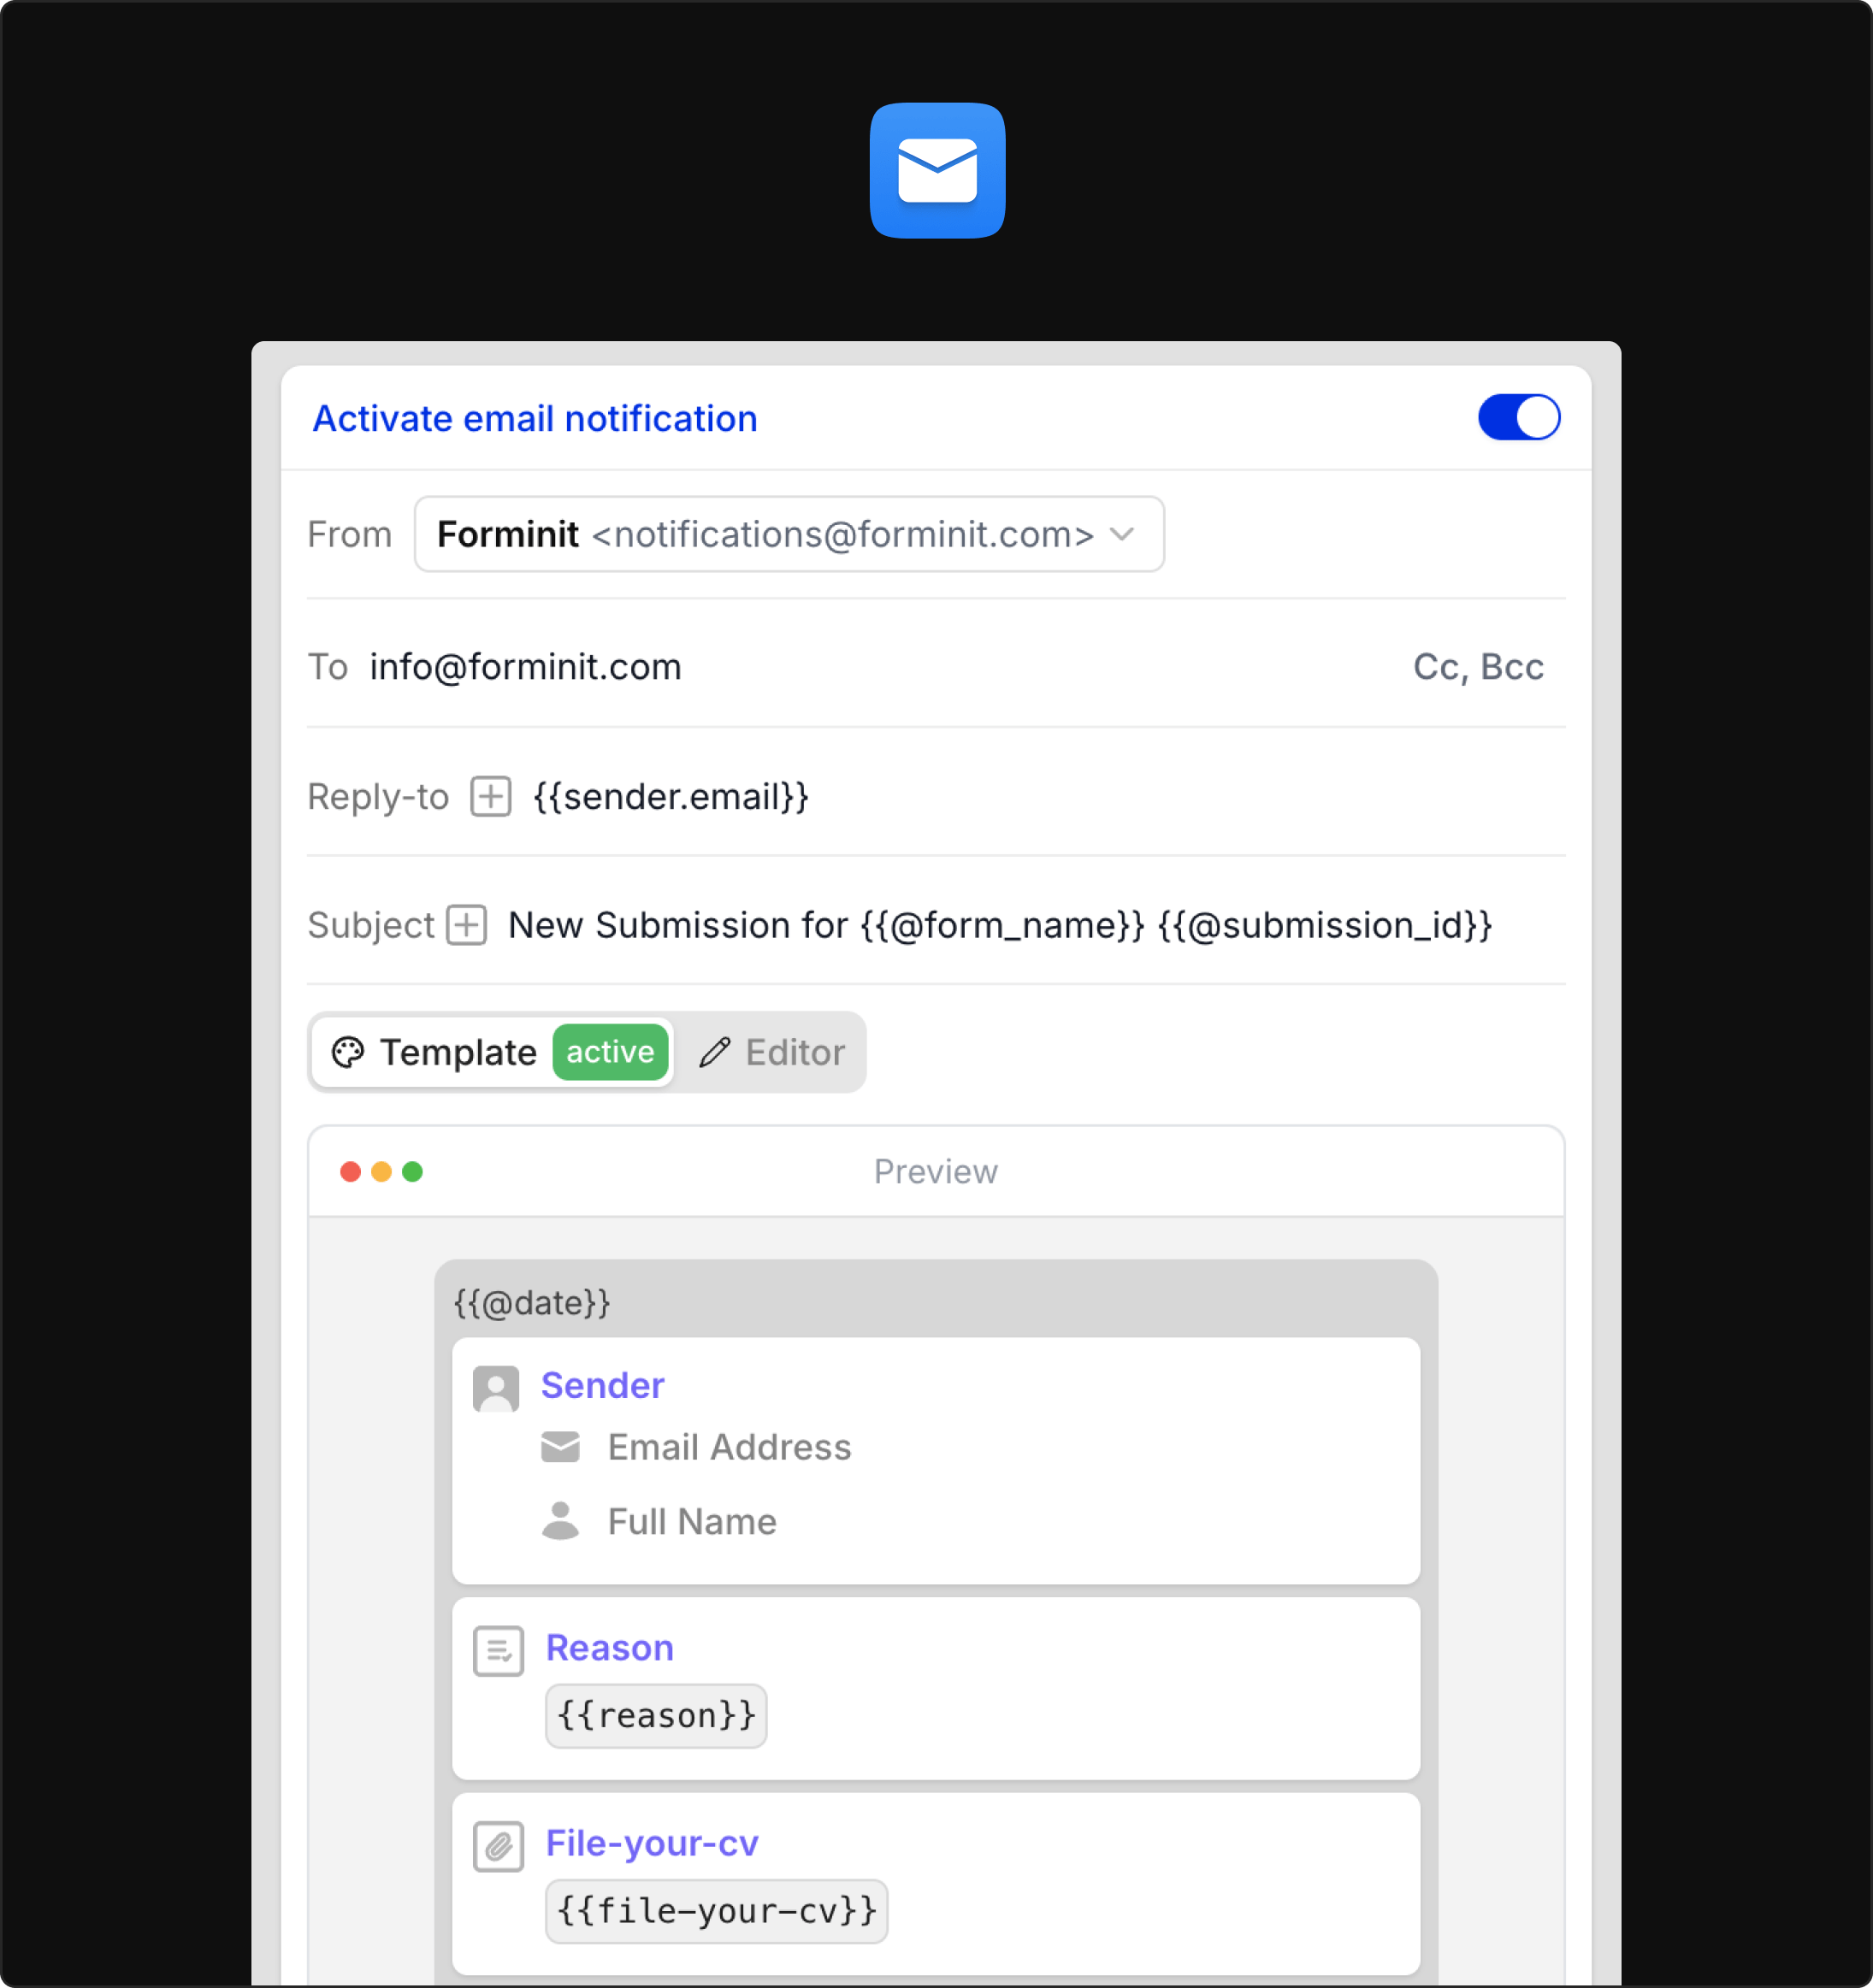
Section titled “Configuring an email notification”- Open the form in your Forminit dashboard.
- Go to Settings → Actions.
- Activate or edit the Email notifications action.
Sender email address of email notifications
-
By default, all notifications are sent from
notifications@forminit.com. -
To send from your own domain (e.g.
forms@yourdomain.com), connect your SMTP by adding configs under Account → SMTP. After adding SMTP configs, you can select your custom email address from the From field on the email notification action.
Recipients separated by commas.
- Primary recipients for the notification.
- Example:
support@acme.com, team@acme.com
Cc / Bcc
Section titled “Cc / Bcc”Add carbon copy or blind carbon copy recipients. Recipients separated by commas.
- Cc: Recipients who should see the email but aren’t the primary owner (e.g. a manager or shared alias).
- Bcc: Internal recipients you don’t want visible to others on the thread.
Example:
- To:
support@acme.com, me@acme.com - Cc:
teamlead@acme.com - Bcc:
archive@acme.com
Reply-to
Section titled “Reply-to”Set reply address. Supports form variables.
- Controls where replies to the notification email are sent.
- Common patterns:
- A shared inbox:
Reply-to = support@acme.com - The actual submitter:
Reply-to = {{sender.email}}(insert via the form variable picker in the UI)
- A shared inbox:
Using the submitter’s email as Reply-to lets your team simply hit Reply in their email client to respond directly.
Subject
Section titled “Subject”Email subject line. Supports form variables.
- The subject line of the notification email.
- You can mix static text with form variables to make subjects more meaningful and easier to scan in your inbox.
Examples:
New submission for {{@form_name}} {{@submission_id}}New message from {{sender.fullName}}New booking for {{@form_name}}
Email body
Section titled “Email body”Template
Section titled “Template”Default body using your visible form blocks in order.
- To change visibility, order, and label names of form blocks, go to Settings → Blocks.
- Use this mode if you want a clean, auto-maintained notification that stays in sync with your form schema.
Editor
Section titled “Editor”WYSIWYG editor for custom email content.
- The Editor lets you design a custom email layout with rich text:
- Headings, text formatting, lists
- Inline insertion of form variables
Form constants (built-in variables)
Section titled “Form constants (built-in variables)”Besides form block variables, your form exposes a set of built-in Form constants (prefixed with @) that help when building the subject and email body.
Form constants list:
{{@form_name}}Form name{{@date}}Submission date{{@submission_id}}Submission unique ID{{@referer}}Referrer URL the form was submitted from{{@location}}Location of the sender asCity / Country(e.g.London / United Kingdom)
Best practices
Section titled “Best practices”- Use a unique subject per submission. Include a variable (date, ID, or sender email) to avoid long threaded conversations.
- Set Reply-to to the submitter. If you’d like to reply directly from your inbox, set
Reply-to = {{sender.email}}.
Was this page helpful?
Thanks for your feedback.